
Uncategorized
Can I install running boards on Range Rover myself?

Jul
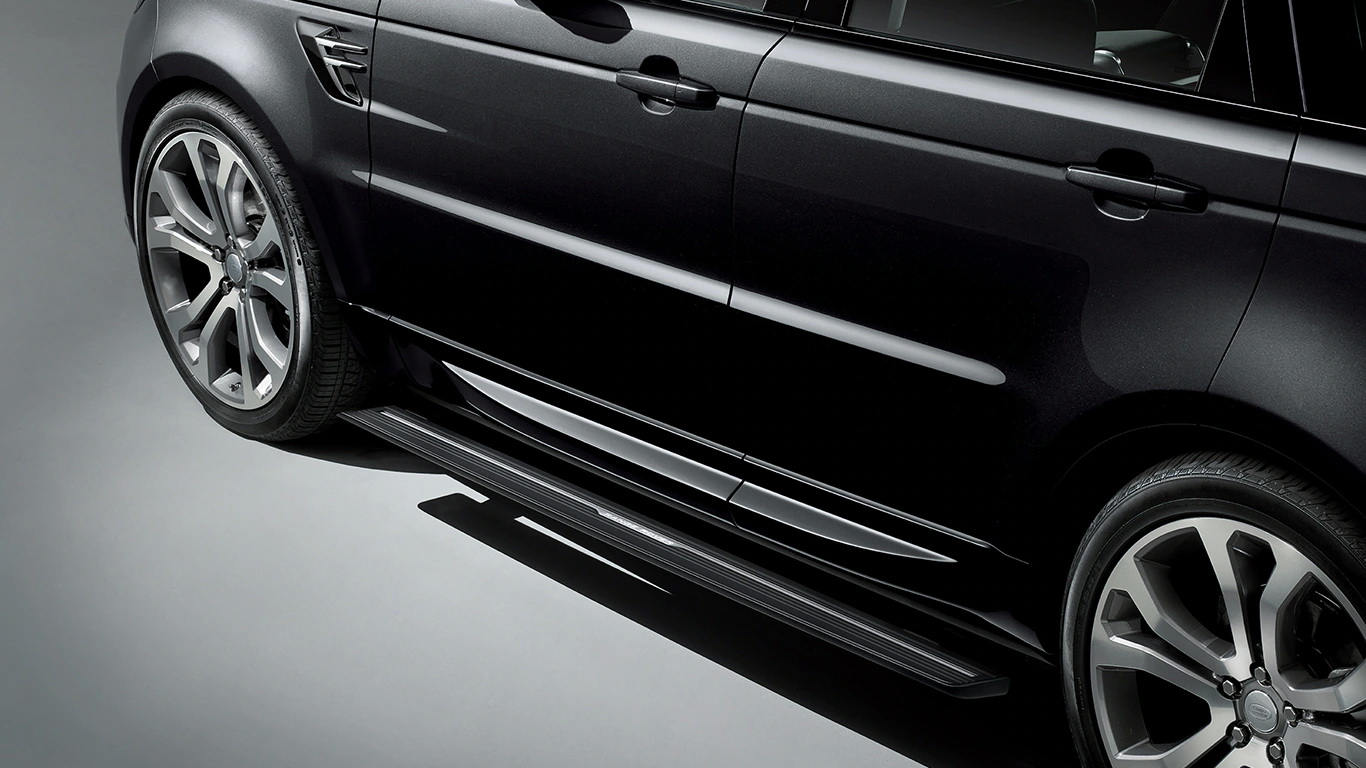
The Range Rover is an epitome of luxury, combining elegance and ruggedness in a remarkable package. To enhance its functionality and aesthetics, many Range Rover owners consider adding running boards to their vehicles. Range Rover deployable side steps manual offer a practical step for easier entry and exit but also add a touch of style to your beloved SUV. We will explore the possibility of installing running boards on a Range Rover by yourself, covering the costs involved, the necessary tools, the installation process, and how running boards mount to the vehicle.
How much does it cost to install running boards?
The cost of running boards can vary significantly based on their design, material, and brand. On average, a set of running boards for a Range Rover can cost anywhere from $200 to $800 or even more, depending on the quality and features. You can find a wide range of options, from basic black textured running boards to premium stainless steel ones with illuminated steps.
However, one of the primary advantages of installing running boards yourself is the potential cost savings. Range Rover Sport side steps at an automotive shop can add a considerable amount to the overall cost. By taking the DIY route, you can allocate those savings to acquiring higher-quality running boards or other accessories for your Range Rover.
What tools do you need to install running boards?
Before you begin the installation process, it’s essential to gather all the necessary tools to ensure a smooth and efficient procedure. Here’s a list of tools you’ll likely need:
Screwdriver set (flat-head and Phillips-head)
Socket set
Torque wrench
Trim panel removal tool or a flat plastic pry tool
Drill and drill bits (if drilling is required for mounting)
Measuring tape or ruler
Marker or chalk
Safety gloves and goggles
Keep in mind that the specific tools required might vary based on the running board model and your Range Rover’s year and trim. Always refer to the installation manual provided with the running boards for any model-specific instructions.
How do you install a side running board?
Installing side running boards on your Range Rover may seem like a daunting task, but with the right approach and patience, it can be accomplished successfully. Follow these steps to install side running boards on your Range Rover:
Prepare the area Park your Range Rover on a flat surface and engage the parking brake for safety. Ensure there’s enough space to move around the vehicle during the installation process.
Align the running board Hold the running board against the side of your Range Rover to determine its positioning. Use a measuring tape or ruler to ensure it is centered and level with the ground. Mark the mounting locations lightly with a marker or chalk.
Remove the factory side trim (if applicable) In some cases, you may need to remove the factory side trim to make way for the running board’s installation. Use a trim panel removal tool or a flat plastic pry tool to carefully detach the side trim. Be gentle to avoid damaging the vehicle’s exterior.
Drill mounting holes (if required) If your running boards require drilling for mounting, use the appropriate-sized drill bit to create the holes at the marked locations. Always double-check the manual to ensure precise measurements.
Install brackets and hardware Attach the brackets provided with the running board to the mounting holes. Secure them tightly using the supplied hardware and a socket set. If there are torque specifications, ensure you follow them diligently to avoid over-tightening.
Attach the running board With the brackets in place, carefully lift the running board and slide it into position, aligning it with the brackets. Check for proper fitment and make any necessary adjustments before securing the running board in place.
Finalize the installation Double-check all the mounting points to ensure everything is securely fastened. Test the running board by putting weight on it to verify its stability. Once you are confident in its installation, repeat the same steps for the other side if you have a pair of running boards.
How do running boards mount?
Running boards are mounted to the vehicle’s frame or body using specific brackets and hardware. The mounting method can vary depending on the running board design and the vehicle model.
Frame-mounted
Some running boards are attached directly to the vehicle’s frame. This mounting style provides robust support and durability, making it ideal for off-road use and heavy-duty applications.
Body-mounted
Other running boards may be attached to the vehicle’s body using brackets that are secured to existing mounting points. While not as rugged as frame-mounted ones, body-mounted running boards are still sturdy and more than capable of handling everyday usage.
No-drill installation
Many modern running boards are designed for a no-drill installation, utilizing existing mounting points or utilizing 3M adhesive technology to securely attach to the vehicle. This makes the installation process more straightforward and avoids the need for drilling into the vehicle’s body.
Adding running boards to your Range Rover can elevate both its functionality and appearance. While the installation process may require some effort and attention to detail, it is a rewarding endeavor that allows you to customize your vehicle to suit your needs and preferences. By following the manufacturer’s instructions and using the right tools, you can successfully install running boards on your Range Rover and enjoy the convenience and style they bring to your SUV.